
Most vintage carburetors don’t fail from age alone-they fail because someone “cleaned” them without understanding the passages, float settings, or gasket stack-up. I’ve rebuilt enough neglected units to know a rushed job can turn a simple afternoon repair into weeks of hard starting, fuel leaks, and wasted parts money.
If your engine stumbles at idle, floods on startup, or falls flat under throttle, the carburetor usually isn’t beyond saving. The problem is knowing what to inspect, what to replace, and what must be adjusted with precision.
Below, I break down the exact step-by-step process to disassemble, clean, rebuild, and tune a vintage carburetor at home-so you can restore reliable fuel delivery, avoid expensive mistakes, and get the engine running the way it should.
Vintage Carburetor Rebuild Step by Step: Home Workshop Tools, Safe Disassembly, and Part Identification That Prevents Costly Mistakes
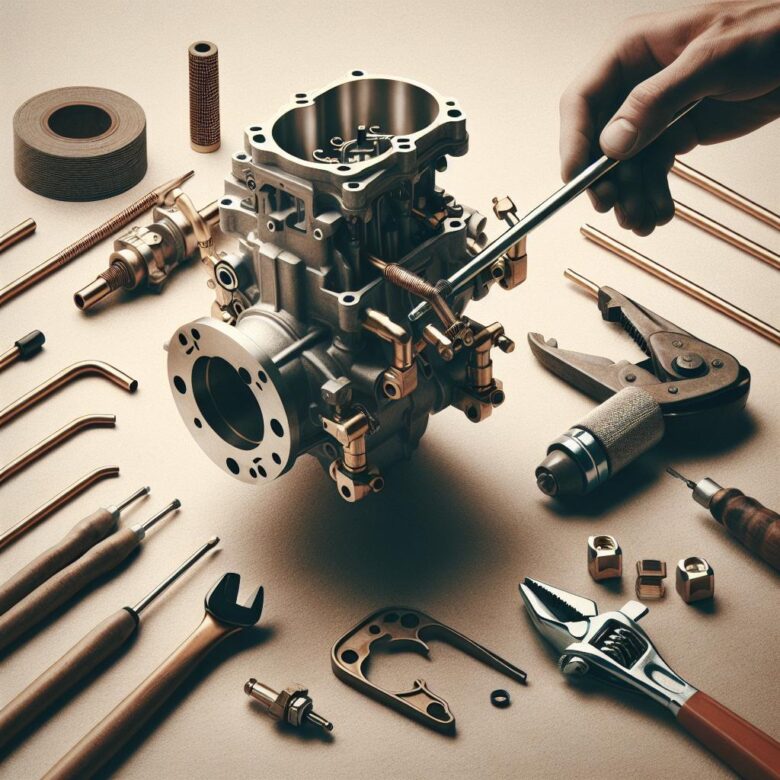
Most vintage carburetor failures after a “rebuild” trace back to one avoidable error: mixing calibrated brass parts or damaging soft castings during teardown. Set up a clean bench with JIS screwdrivers, hollow-ground bits, a handheld impact driver, numbered trays, and a phone or Carburetor Shop Manual CD reference before touching the first screw.
| Stage | Correct Method | Costly Mistake Prevented |
|---|---|---|
| Pre-disassembly | Photograph linkage angles, choke rod orientation, and idle screw turns to lightly seated. | Incorrect reassembly geometry and impossible baseline tuning. |
| Safe teardown | Use penetrating oil on bowl screws, support the body on wood blocks, and remove jets with properly fitted gunsmith bits. | Stripped screw heads, cracked air horn flanges, and ruined jet slots. |
| Part identification | Bag and label emulsion tubes, main jets, power valve, check balls, and springs by circuit, not by side. | Crossed metering components that create lean surge, flooding, or dead accelerator pump response. |
Field Note: I once corrected a Rochester 2GC that had three identical-looking check balls swapped during cleaning; one five-minute comparison against teardown photos restored the pump shot and eliminated a hot-start fuel dribble the owner had chased for months.
How to Clean, Inspect, and Reassemble a Vintage Carburetor: Expert Bench Tests, Float-Level Adjustments, and Needle-Valve Fixes for Reliable Performance
Most vintage carburetor failures after a rebuild trace to one of three errors: abrasive cleaning that enlarges jets, a float level set even 1.0-1.5 mm off spec, or a needle valve that seals dry on the bench but leaks under head pressure. Clean castings in carb dip or ultrasonic solution, chase passages with nylon filament only, then verify mating surfaces with a straightedge before reassembly.
| Step | What to Check | Bench Standard |
|---|---|---|
| Inspection | Throttle shaft wear, warped body, jet stamping, emulsion tube corrosion | No visible side-play that affects idle vacuum; jets must match factory size |
| Float setting | Measure with gasket removed and carb inverted at the specified needle-contact angle | Set to factory spec using calipers; confirm float drop prevents needle bind |
| Needle-valve test | Remote fuel bottle or low-pressure hand pump, then observe seepage | Hold pressure without drip for 60 seconds; verify with Mityvac and a clear sight tube if applicable |
Field Note: I corrected a persistent rich-idle complaint on a 1972 Mikuni-equipped twin by finding a reproduction needle seat that passed a dry air test but began weeping only after five minutes with fuel in the bowl, raising the level just enough to swamp the pilot circuit.
Tuning a Rebuilt Vintage Carburetor at Home: Idle Mixture Setup, Vacuum Leak Checks, and Road-Test Adjustments for Smooth Cold Starts and Throttle Response
A rebuilt vintage carburetor that is even 1/8 turn off on the idle-mixture screws can mask a clean rebuild with lean cold starts, off-idle stumble, or a rich, sooty idle. The most common mistake is tuning by ear before verifying choke pull-off, curb idle speed, and manifold vacuum stability with a gauge.
| Adjustment Area | What to Do | Target Result |
|---|---|---|
| Idle mixture | Warm the engine fully, connect a vacuum gauge, set base idle to spec, then turn each mixture screw in small equal increments for highest steady vacuum and smoothest idle; re-set curb idle after each change. A Mityvac hand vacuum pump is useful for confirming choke pull-off and vacuum-operated circuits before final tuning. | Peak stable vacuum, clean idle, no loading up |
| Vacuum leak check | Inspect carb base gasket, throttle shaft wear, intake runners, and all capped ports; use propane or carb-cleaner sparingly around suspect areas while watching for RPM or vacuum changes. | No RPM flare, no vacuum drop, consistent idle quality |
| Road-test adjustment | Test cold start, tip-in throttle, light cruise, and hot restart; hesitation off idle usually points to accelerator-pump stroke, fast-idle cam setting, or a slightly lean mixture. | Immediate throttle response and predictable cold-start behavior |
Field Note: On a Rochester 2GC that kept stumbling only in the first two minutes of operation, correcting the choke pull-off opening with a Mityvac and backing each idle screw out just 1/8 turn eliminated the flat spot without touching jets.
Q&A
1. What tools and parts do I need before rebuilding a vintage carburetor at home?
You should gather basic hand tools, a carburetor rebuild kit matched to the exact carburetor model, carburetor cleaner, compressed air, small screwdrivers, needle-nose pliers, a gasket scraper, and a clean parts tray. It is also wise to have a service manual or exploded diagram, because vintage carburetors often have model-specific jets, check balls, springs, and float settings.
- Essential tools: Screwdrivers, small wrenches, picks, pliers
- Cleaning supplies: Carb cleaner, ultrasonic cleaner if available, compressed air
- Replacement parts: Gaskets, needle and seat, accelerator pump, seals, float if damaged
- Reference material: Factory manual or verified rebuild diagram
The most common mistake is starting the job without confirming the carburetor identification number and ordering the wrong kit.
2. What are the most important steps to follow during a home carburetor rebuild?
The safest approach is to work methodically and document everything during disassembly. Take clear photos before removing parts, keep components organized in order, and never force stuck screws or brass fittings. After disassembly, clean every passage thoroughly, inspect all wear points, and replace all soft parts included in the kit.
| Step | What to Do |
|---|---|
| 1 | Identify the carburetor model and get the correct rebuild kit |
| 2 | Photograph linkage, screws, and adjustment positions before removal |
| 3 | Disassemble carefully and separate small parts by section |
| 4 | Clean the body, jets, and internal passages completely |
| 5 | Inspect throttle shafts, float, needle and seat, and mating surfaces |
| 6 | Reassemble using new gaskets and set float level to specification |
| 7 | Bench-check linkage movement and reinstall for final tuning |
Float height adjustment is especially critical. Even a well-cleaned carburetor will run poorly if the float level is wrong.
3. How do I know if the rebuild was successful, and what problems mean I need to recheck my work?
A successful rebuild usually results in easier starting, smoother idle, better throttle response, and reduced fuel leakage. After installation, check for external leaks first, then verify idle mixture, choke operation, and off-idle acceleration. If the engine still hesitates, floods, or idles inconsistently, the issue is often related to float level, blocked passages, vacuum leaks, or incorrectly installed internal parts.
- Good signs: Stable idle, clean acceleration, no fuel dripping, predictable adjustment response
- Warning signs: Hard starting, black smoke, fuel overflow, bogging under throttle, erratic idle
- Common recheck areas: Float setting, accelerator pump installation, gasket placement, jet cleanliness, vacuum leaks at the base
If tuning changes have little effect, inspect for throttle shaft wear or warped housings, because some vintage carburetors have mechanical wear that a standard rebuild kit cannot correct.
Closing Recommendations
A vintage carburetor will forgive age, but it rarely forgives shortcuts. The rebuild that lasts is the one measured twice, cleaned obsessively, and tuned with patience after the engine is fully warm.
Pro Tip: The biggest mistake I still see is mixing old jets, screws, and springs during teardown, then chasing phantom tuning problems later. Keep every circuit’s parts separated in labeled trays, and always verify float height against the exact carburetor number-not a “close enough” spec from a similar model.
Before you close this tab, do one thing: photograph your rebuilt carburetor from all four sides and save the images with the model number, jet sizes, float setting, and idle mixture baseline. That record will save hours the next time you diagnose a stumble, flood, or hard-start issue.

An expert in industrial history and a renowned collector of vintage European motors. Dr. Thorne has spent over twenty years documenting the evolution of automotive design. Through Charangas, he provides enthusiasts with deep-dive technical insights and preservation strategies, blending academic rigor with the raw thrill of the open road.