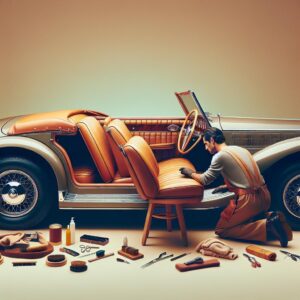
Most first-time classic car restorations stall before the real work begins because the owner buys the wrong tools, skips the essentials, and burns money fixing preventable mistakes. I’ve seen beginners sink hundreds into shiny equipment they barely use, while lacking the basic gear that actually keeps a project moving.
From seized fasteners to rust repair and electrical gremlins, the right starter toolkit saves time, protects rare parts, and keeps frustration from killing momentum. Get this wrong, and your “budget” restoration turns into an expensive garage ornament.
Below, I break down the essential tools you actually need to start your first classic car restoration-so you can build a smart workshop, avoid costly beginner errors, and make steady progress from teardown to reassembly.
Must-Have Classic Car Restoration Tools for Beginners: What to Buy First and What to Skip
Most first-time restorers waste money on chrome-plated “complete kits” and still lack the tools that actually prevent damaged fasteners, warped panels, and bad measurements. Buy for disassembly, inspection, and accuracy first; skip specialty gear until the car is stripped and assessed.
| Buy First | Why It Matters | Skip Initially |
|---|---|---|
| Quality socket set, torque wrench, penetrating oil, impact driver | Old hardware seizes, rounds off, and snaps; controlled removal saves original parts and threads | Large air compressor and full pneumatic kit |
| Digital caliper, straightedge, feeler gauges, LED inspection light | Lets you verify wear, panel gaps, runout, and missing shims before ordering parts | English wheel, bead roller, or body rotisserie |
| Jack stands, creeper, fire extinguisher, labeled storage bins, Mitutoyo digital caliper | Safety and parts organization prevent the two biggest beginner losses: injury and missing hardware | Low-cost “restoration” welders with poor duty cycle |
Field Note: On a 1968 Mustang teardown, the owner bought a cheap MIG first, but the tool that saved the project was a manual impact driver and a Mitutoyo caliper, which preserved the original door hinge screws and exposed .018-inch rotor variation before any money was wasted on cosmetic parts.
Bodywork, Rust Repair, and Fastener Removal Tools That Save Time on Your First Classic Car Project
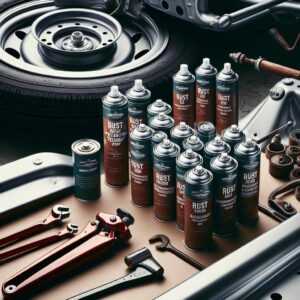
Most first-time restorers waste hours trying to “save” rusted hardware with the wrong tools, then stretch sheetmetal or snap captive bolts that were removable in five minutes with proper heat and extraction. For bodywork, speed comes from controlled metal removal, clean fastener extraction, and repeatable panel shaping-not brute force.
- Fastener removal: Start with a quality induction heater such as the Mini-Ductor, six-point impact sockets, left-hand drill bits, and a thread chaser set; this combination breaks corrosion without rounding heads or damaging surrounding paint and seam sealer.
- Rust repair: Use a 3-inch cut-off tool, spot-weld cutter, Blair-type hole cutter, carbide burrs, and a compact belt file for flange cleanup; pair that with a shrinker/stretcher and Cleco panel clamps so patch panels fit before welding, not after filler.
- Bodywork finishing: A stud welder dent puller, body hammer and dolly set, slapping spoon, contour gauge, and long sanding blocks outperform generic slide hammers and short blocks by preserving panel shape and exposing low spots early.
Field Note: On a first-gen Camaro quarter repair, heating seized bumper-bracket bolts with a Mini-Ductor instead of an open flame cut removal time from nearly an hour to under ten minutes and avoided blistering factory lead at the sail panel seam.
Garage Setup Essentials for Classic Car Restoration: Safety Gear, Storage Solutions, and Budget-Smart Equipment
Most first-time restorations lose time and parts in the garage, not on the car. A poor setup leads to mislabeled fasteners, contaminated assemblies, and preventable injuries long before paint or drivetrain work begins.
| Garage Need | What to Use | Why It Matters |
|---|---|---|
| Safety baseline | ANSI Z87.1 eye protection, nitrile gloves, welding jacket, steel-toe boots, Class ABC extinguisher, proper respirator for paint or rust dust | Grinding sparks, fuel vapors, and old undercoating residue create real exposure risks; PPE must match the task, not just the toolbox. |
| Storage and labeling | Clear bin system, magnetic trays, zip bags, shelf tags, and photo logging with Sortly | Organized teardown prevents hardware loss and preserves reassembly sequence, especially on trim, clips, and mixed-thread fasteners. |
| Budget-smart equipment | LED shop lights, rolling tool cart, 6-gallon compressor, jack stands, creeper, torque wrench, and a used parts washer | These deliver immediate productivity without tying up budget in specialty tools you may only need once. |
Field Note: On a 1967 Mustang teardown, switching from coffee cans to shelf-coded bins and Sortly cut reassembly hunting time by nearly two days and exposed one mismatched suspension bolt before it damaged fresh threads.
Q&A
1. What tools do I actually need to start my first classic car restoration without overspending?
Start with reliable basics before buying specialty equipment. For most first restorations, focus on tools that help with disassembly, inspection, cleaning, and safe reassembly.
- Hand tools: Full socket and wrench set in SAE and metric, screwdrivers, pliers, locking pliers, breaker bar, torque wrench, and hammers.
- Lifting and safety equipment: Hydraulic floor jack, quality jack stands, wheel chocks, work gloves, eye protection, fire extinguisher, and hearing protection.
- Power tools: Angle grinder, electric drill, impact wrench, and a good work light.
- Rust and bodywork basics: Wire wheels, scrapers, body hammers, dolly set, sanding blocks, and a dual-action sander if budget allows.
- Inspection and measuring tools: Multimeter, compression tester, feeler gauges, caliper, magnet, and inspection mirror.
- Organization tools: Zip bags, labels, storage bins, masking tape, and a phone or camera for documenting every step.
If your budget is limited, buy the best safety gear, torque wrench, jack stands, and core hand tools first. Many specialty tools can be rented or borrowed once the project reveals what is truly needed.
2. Which tool is most commonly underestimated by first-time restorers?
The most underestimated tool is usually a torque wrench, closely followed by a multimeter and a strong organization system. Beginners often spend heavily on visible tools like grinders and impact guns, but poor reassembly and electrical diagnosis cause more frustration than disassembly.
| Tool | Why It Matters |
|---|---|
| Torque wrench | Prevents stripped threads, warped components, and unsafe fastener tightening during reassembly. |
| Multimeter | Essential for tracing faulty wiring, poor grounds, battery drain, and charging issues common in older cars. |
| Labeling and storage supplies | Keeps hardware, trim, and small parts from getting mixed up or lost over a long project timeline. |
In classic car work, successful restoration depends as much on controlled, accurate reassembly as on taking the car apart.
3. Should I buy welding and paint tools for my first restoration, or wait?
In most cases, wait until you confirm the car truly needs that level of in-house work and you are committed to learning those skills properly. Welding and painting equipment can be worthwhile, but they involve more than the cost of the tool itself.
- Buy welding tools if the car has predictable rust repair needs, you have proper workspace ventilation, and you are prepared to practice on scrap metal first.
- Delay welding tools if the project is mainly mechanical, cosmetic, or bolt-on restoration work.
- Buy paint tools only if you can control dust, moisture, air supply quality, and safety protection.
- Delay paint tools if you are aiming for high-end finish quality, because poor prep and environment usually ruin first-time paint jobs.
For many first restorations, a smart approach is to handle teardown, cleaning, parts sourcing, and mechanical work yourself, then outsource structural welding or final paint if needed. That usually saves money compared with buying professional-grade equipment too early and redoing poor results later.
Wrapping Up: Essential Tools for Starting Your First Classic Car Restoration Insights
Your first restoration will be shaped less by ambition than by the discipline of your setup. Good tools save money, protect original parts, and prevent the kind of avoidable damage that turns a promising project into a stalled shell.
Pro Tip: The biggest mistake I still see first-time restorers make is buying specialty tools too early while ignoring measuring, labeling, lighting, and safe lifting equipment. Precision and organization beat a crowded toolbox every time.
Before you close this tab, create a one-page tool checklist in your phone or notebook with three columns: buy now, borrow, and wait. Then photograph your car from every angle and label one storage bin for removed hardware. That single habit will pay off months from now.

An expert in industrial history and a renowned collector of vintage European motors. Dr. Thorne has spent over twenty years documenting the evolution of automotive design. Through Charangas, he provides enthusiasts with deep-dive technical insights and preservation strategies, blending academic rigor with the raw thrill of the open road.